Appearance
Timer 定时器测试
定时器setTimerout 是非常常用的一个 api,比如我们想要在 1000ms 后做某件事情,这时候我们就会需要使用这个 api,所以我们需要来学习一下如何测试这个 api。
这节算是进阶课程内容了,我们会学习几个新的 api。学习几个新的测试思路
案例
举个例子 🌰,我们需要 4s 后执行某段程序。代码如下:
ts
export function after4000ms(fn: (args: string) => string) {
	setTimeout(() => {
		fn('hello timer')
	}, 4000)
}
export function after4000ms(fn: (args: string) => string) {
setTimeout(() => {
fn('hello timer')
}, 4000)
}很眼熟是吧,和我们前一节学习异步回调函数的 demo 基本一样。
但是那时候我们只能实现说确实知道是异步的,但是并不知道是不是具体的 4000ms。
编写单测
使用旧知识
看到这个 demo,第一想法大家会怎样编写测试用例呢?我第一想法是这么写的:
ts
it('第一想法', () => {
	const testFn = (str: string) => {
		expect(str).toBe('hello timer')
		return str
	}
	after4000ms(testFn)
})it('第一想法', () => {
const testFn = (str: string) => {
expect(str).toBe('hello timer')
return str
}
after4000ms(testFn)
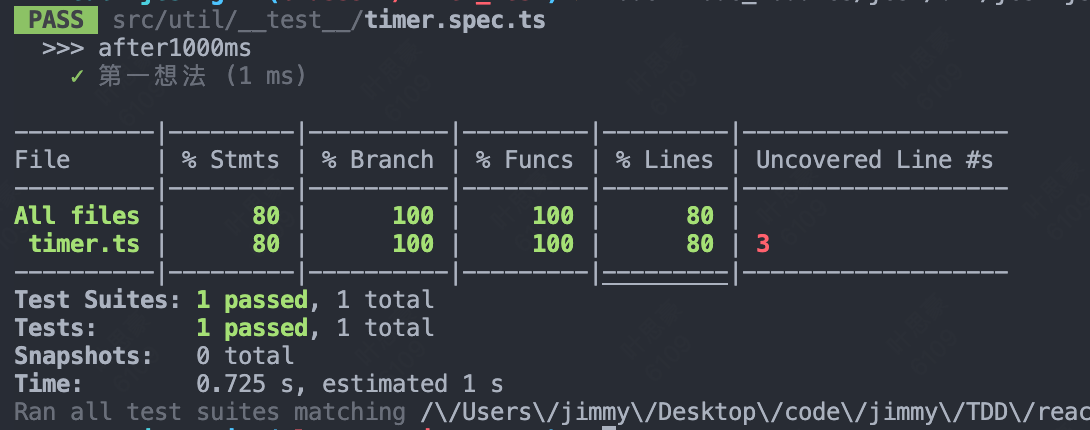
})执行这个单测之后呢,是通过的,但是时间上显然是不对的。

这个单测只执行了小于 1s 的时间,并没有定时器的概念。所以这么测试是不对的。
之前讲回调函数的时候,我们说过涉及异步的回调函数,我们可以使用 done 函数来等待 timer 结束。所以我们基于这点知识,我们再来重构一下我们的测试用例:
ts
it('使用 done 测试', done => {
	const testFn = (str: string) => {
		expect(str).toBe('hello timer')
		done()
		return str
	}
	after4000ms(testFn)
})it('使用 done 测试', done => {
const testFn = (str: string) => {
expect(str).toBe('hello timer')
done()
return str
}
after4000ms(testFn)
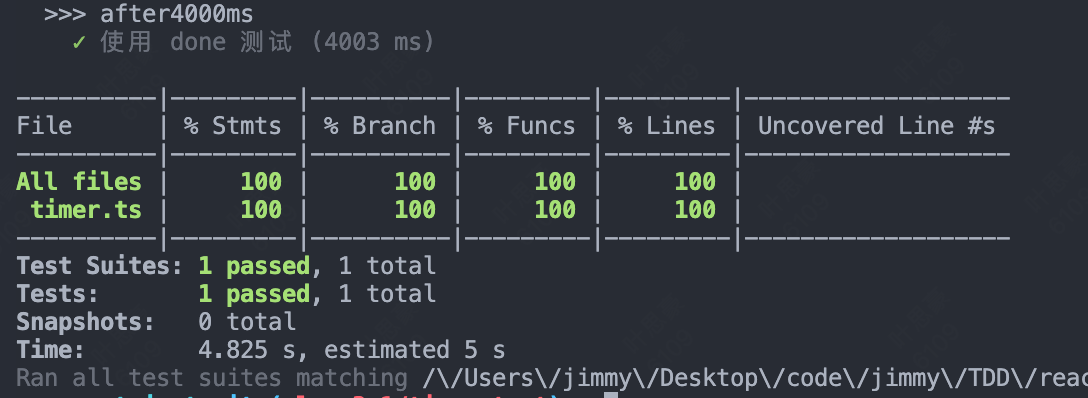
})我们这样测试了之后,程序的执行时间好像确实是久了,输出的内容如下: 
耗时将近 5s,看起来正常,但是我们想象一下,如果有的电脑设备他比较老,算力比较低,可能本身的定时器时间是 2s,但是脚本执行下来花了将近 5s,也是有可能的,所以我们本质上并没有确切的知道它回调函数的执行时间。
所以我们得再做一次调整:
ts
it('测试时间过了 1000ms', done => {
	const startTime = Date.now()
	const testFn = (str: string) => {
		const endTime = Date.now()
		expect(endTime - startTime > 4000).toBeTruthy()
		expect(str).toBe('hello timer')
		done()
		return str
	}
	after4000ms(testFn)
})it('测试时间过了 1000ms', done => {
const startTime = Date.now()
const testFn = (str: string) => {
const endTime = Date.now()
expect(endTime - startTime > 4000).toBeTruthy()
expect(str).toBe('hello timer')
done()
return str
}
after4000ms(testFn)
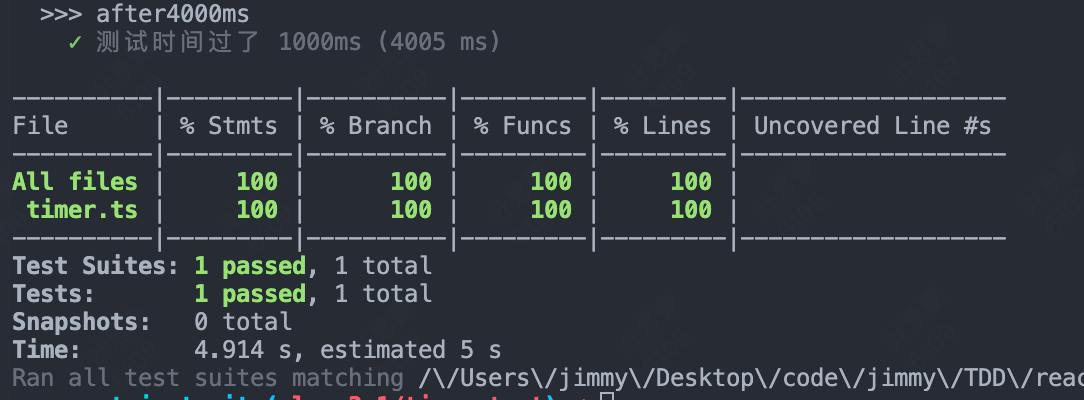
})这样写了之后,再看输出,也是通过的,最重要的是expect(endTime - startTime > 4000).toBeTruthy(),说明执行时间确实是 4s 后。

存在的问题
看起来我们好像已经能够很完美的测试了,但是我们发现这样写我们必须每次都等待定时器执行结束,如果定时器是 1min 后执行,那我们程序就会等待 1min。
jest 本身如果等待时间超过 5s 就会报错了
所以以上并不是正确的解决思路。jest 实质上提供了专门的 api 用于我们测试。下面我们来学习一下。
官网优解
使用 mock 的方案
ts
it('模拟时间&模拟api', () => {
	jest.useFakeTimers()
	jest.spyOn(global, 'setTimeout')
	expect(setTimeout).toHaveBeenCalledTimes(0)
	after4000ms(() => 'demo')
	expect(setTimeout).toHaveBeenCalledTimes(1) // 执行1次
	expect(setTimeout).toHaveBeenCalledWith(expect.any(Function), 4000) // 4000ms调用
})it('模拟时间&模拟api', () => {
jest.useFakeTimers()
jest.spyOn(global, 'setTimeout')
expect(setTimeout).toHaveBeenCalledTimes(0)
after4000ms(() => 'demo')
expect(setTimeout).toHaveBeenCalledTimes(1) // 执行1次
expect(setTimeout).toHaveBeenCalledWith(expect.any(Function), 4000) // 4000ms调用
})useFakeTimer()
使用伪造的时间
spyOn
模拟 api
这些 api 其实我们看名字就能知道对应的意思,fake(伪造的),spy(间谍)
核心思路:
我们after4000ms这个函数是使用 setTimerout 来实现的,我们我们只需要判断setTimerout的执行次数和执行时间就可以了。
继续优化
上面的例子我们只是监听了setTimerout的执行次数,如果单测内本身就有写了setTimerout,那这样写就不准了,也会增加一些心智负担,我们我们要准确的知道一个函数是否被调用了,我们可以使用jest.fn() 创建一个 mock 函数
ts
it('1000ms后函数确实被调用了', () => {
	jest.useFakeTimers()
	jest.spyOn(global, 'setTimeout')
	const fn = jest.fn()
	after4000ms(fn)
	expect(fn).toHaveBeenCalledTimes(0) // fn 函数被调用0次
	jest.runAllTimers()
	expect(setTimeout).toHaveBeenCalledTimes(1) // fn 函数被调用1次
	expect(setTimeout).toHaveBeenCalledWith(expect.any(Function), 4000)
})it('1000ms后函数确实被调用了', () => {
jest.useFakeTimers()
jest.spyOn(global, 'setTimeout')
const fn = jest.fn()
after4000ms(fn)
expect(fn).toHaveBeenCalledTimes(0) // fn 函数被调用0次
jest.runAllTimers()
expect(setTimeout).toHaveBeenCalledTimes(1) // fn 函数被调用1次
expect(setTimeout).toHaveBeenCalledWith(expect.any(Function), 4000)
})Jest.fn
我们可以通过这个 api 来 mock 一个函数,通过这个函数我么可以知道这个函数的很多信息,如是否被调用等等。
jest.runAllTimers()
相当于快进时间。
总结
这节关于定时器的单测用例编写内容就到这里了,我们主要是学习了几个新的 api:
- useFakeTime
- spyOn
- fn
- runAllTimers
以上的内容大家需要自行课后实现一次,更能加深理解。
 前端加油站🧠